Gua Sha, an ancient Chinese healing technique, has become a cornerstone in modern skincare routines. This practice involves the gentle scraping of the skin using a smooth-edged tool, promoting circulation and enhancing overall skin health.
In Traditional Chinese Medicine, it is known to treat deficiency patterns and relieve stagnant energy, a belief that circulatory stagnation simultaneously increases blood flow, facilitating internal healing mechanisms.
With regular care, the facial muscles become brighter as the circulation and lymphatic flow improve. It helps mitigate muscle tension around the face. Overall, it has the purpose of improving muscle tension, increasing wellness, and providing massage therapy to enhance skin light naturally.
Preparatory Work (Equipment and Arrangement)
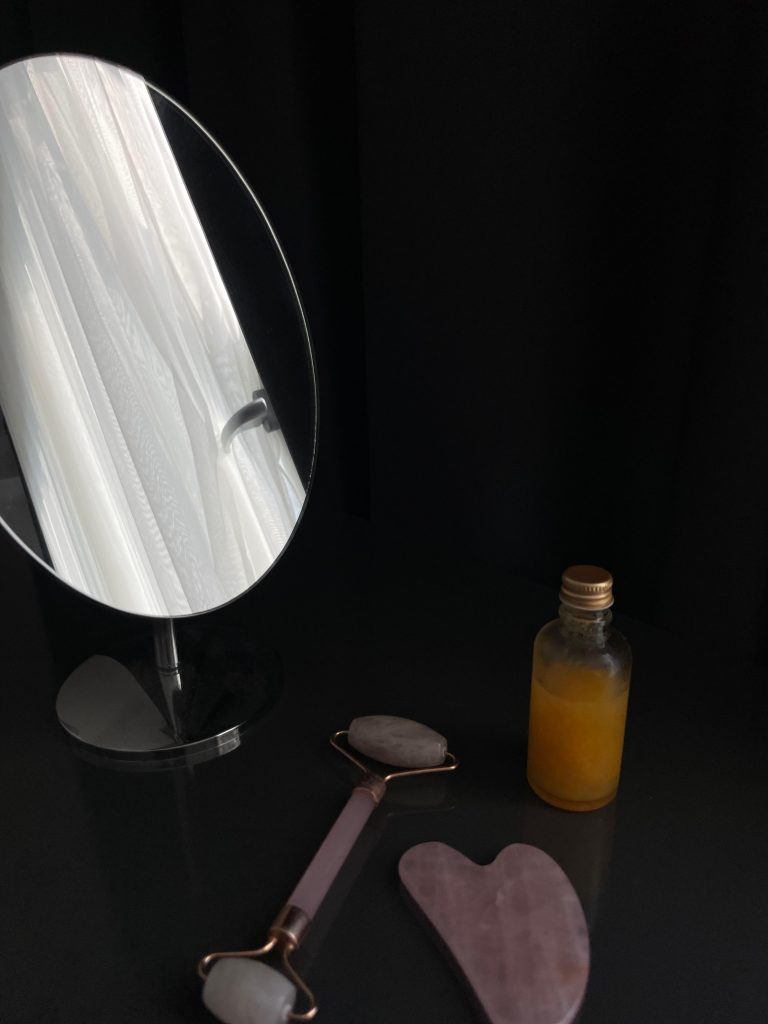
Applying facial oil prior to Gua Sha helps with gliding the tool without skin friction. Collecting the right tools along with having proper preparation is key to beginning the Gua Sha routine.
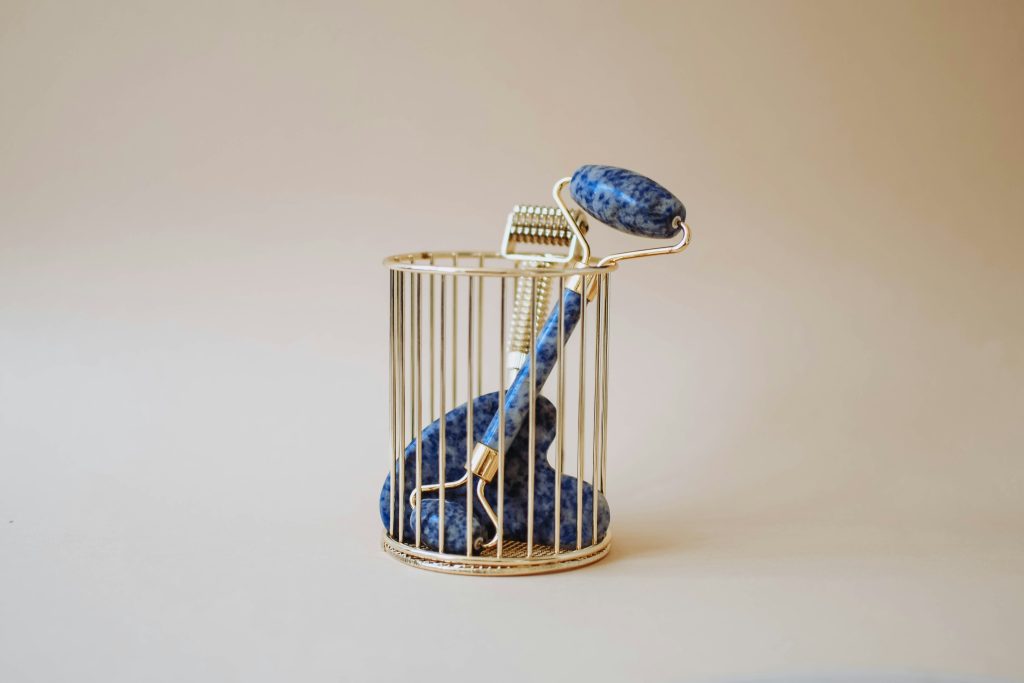
Tool: A proper Gua Sha tool, which is a flat, rounded stone, should be acquired. Most Gua Sha tools have conformed curves or shaped edges that fit the contour of the bones of the face and of the body.
Skincare Prep: The procedure starts with clean skin, so the face should be washed with a gentle cleanser to remove makeup, oil, dirt, and then toner, if available to use. For the skincare prep, usually it is suggested to apply a few drops of facial oil, serum or a light moisturizer.
Never apply gua sha on dry skin; the lubricating product is essential to help the tool glide smoothly and to prevent tugging or bruising of the skin.
Before starting, ensure the gua sha tool and hands are clean, followed by setting up in a comfortable mirror-facing space. With proper preparation, the routines are simpler and effortless, along with ensuring safety with comfort.
Step-by-Step Gua Sha Routine
Technique: Use a gentle, mindful technique during gua sha. Hold the tool at a shallow angle against your skin and apply light to medium pressure; it should feel comfortable, not painful. Always glide the tool in one direction, usually upward and outward, rather than scrubbing it back-and-forth. Each stroke is typically repeated a few times.
To avoid irritation, keep the tool almost flat to your skin (the edge shouldn’t dig straight in). If you’re doing facial gua sha, use a very light touch, unlike the traditional body technique that can leave bruising. A facial routine should never be overly intense or painful. Below is a step-by-step routine covering the major areas of the face, with the proper direction of movement for each:
-
- Neck: Start at the neck to encourage lymphatic flow. With the tool at about 45°, gently sweep upward along the neck. Begin from the base of your neck (just above the collarbone) and glide up toward the jawline. You can do this on the sides of the neck and the back of the neck if desired, always moving upward toward the head. Use one hand to anchor the skin at the collarbone and the other to stroke with the tool, and repeat each stroke several times (e.g, 5 times) before moving to a new spot. This helps open up lymph channels and relax the neck muscles.
- Jawline and Chin: Next, sculpt along the jaw. Starting from the center of your chin, pull the tool upwards and outwards along your jawline toward the ear or earlobe. The notched side of a gua sha tool (if it has one) can fit nicely around the angle of the jaw. Use gentle pressure and follow the curve of your bone. Repeat the stroke on the same path a few times, then do the same on the other side of your jaw. This technique can help mitigate jaw tension and define the jawline.
- Cheeks: Place the tool near the side of your nose or the corner of your mouth and glide it across the cheek toward your temple. Keep the tool flat and move in an upward-outward direction along the cheek. This motion can improve circulation in the cheeks, enhance a natural glow, and reduce puffiness.
- Under-Eye and Brow Area: The eye area is delicate, so use the tool with extra care and very light pressure here. Under the eyes, gently glide the tool from the inner corner of your eye (near the side of the nose) outward toward the temple. Use the curved side of the tool and do not press hard; the goal is to encourage fluid drainage and reduce under-eye swelling without pulling the skin. For the eyebrow area, you can scrape along the brow bone: start at the area just above the inner corner of the eye (above the nose bridge) and move the tool along the eyebrow line toward the temples. This can relieve forehead and brow tension (some people find it helps with sinus pressure or frown lines). Always be gentle around the eyes.
- Forehead: Finally, address the forehead. There are a couple of motions you can do here. One approach is to start at the center of your forehead (between the brows) and stroke outward toward the temple on each side, which helps release tension in the forehead muscles. Another motion is to scrape upward from the eyebrows toward the hairline. You can do a series of strokes going up across the entire forehead, moving from between the brows to the left side, then the center, then the right side. Keep the pressure moderate and the tool flat. Repeat each stroke a few times. This stimulates circulation to the forehead and can give a lifted, refreshed feeling.
- Neck: Start at the neck to encourage lymphatic flow. With the tool at about 45°, gently sweep upward along the neck. Begin from the base of your neck (just above the collarbone) and glide up toward the jawline. You can do this on the sides of the neck and the back of the neck if desired, always moving upward toward the head. Use one hand to anchor the skin at the collarbone and the other to stroke with the tool, and repeat each stroke several times (e.g, 5 times) before moving to a new spot. This helps open up lymph channels and relax the neck muscles.
Once finished, you might also do one or two gentle downward strokes on the sides of your neck (from jaw down to collarbone) to guide any fluid down to the lymph nodes; this is an optional step some practitioners include to finish the facial routine.
Remember to breathe and move slowly throughout the routine. Your skin may develop a slight flush by the end, which is normal as circulation increases. If you see any significant red spots or bruising on the face, you’re using too much pressure; lighten up on the next session.
Gua sha can be performed on other body parts as well to ease muscle pain. The technique is similar, you’d apply oil and scrape in one direction over tight muscles (for example, on the shoulders or back). Always avoid using extreme force, and do not perform gua sha over sensitive areas like joints or the spine. If a certain spot (like the mid-back) is hard to reach on your own, ask a friend or partner to assist rather than straining yourself.
Source: Photo by Content Pixie on Unsplash
Post-Routine Care
After a gua sha session, drink water to stay hydrated and help your body recover. It’s a good idea to drink a glass of water after gua sha. Hydration may help with lymphatic drainage and will generally support your body as it flushes out any toxins or metabolic waste mobilized by the massage.
Most important thing, clean your gua sha tool after each session. Wash the tool with warm water and a gentle soap to remove oils and skin residue, then dry it completely.
Frequency and Additional Tips
How often to Gua Sha: For facial beauty routines, consistency is key. It’s recommended to do gua sha at least a few times per week, if not daily, to see lasting results. You can incorporate it into your nightly skincare regimen or morning routine.
Additional Tips:
-
- Use light pressure on the face: Facial gua sha should be a soothing massage, not a deep tissue scrape.
- Use light pressure on the face: Facial gua sha should be a soothing massage, not a deep tissue scrape.
-
- Avoid sensitive or irritated skin: Do not apply gua sha over acne breakouts, open wounds, rashes, or inflamed skin. Gua sha could aggravate these conditions. Instead, wait until the skin heals before treating that area or working around it gently.
- Avoid sensitive or irritated skin: Do not apply gua sha over acne breakouts, open wounds, rashes, or inflamed skin. Gua sha could aggravate these conditions. Instead, wait until the skin heals before treating that area or working around it gently.
-
- Clean and don’t share tools: Treat your gua sha tool like a personal care item. If you do share it, thoroughly sterilize it before the next use.
- Clean and don’t share tools: Treat your gua sha tool like a personal care item. If you do share it, thoroughly sterilize it before the next use.
-
- Listen to your body (and face): Everyone’s pain tolerance and skin sensitivity are different. If an area is very sore or if your skin becomes very red, give that spot a rest. Gua sha should never break the skin. Use smooth, confident strokes and maintain an awareness of how you feel.
- Listen to your body (and face): Everyone’s pain tolerance and skin sensitivity are different. If an area is very sore or if your skin becomes very red, give that spot a rest. Gua sha should never break the skin. Use smooth, confident strokes and maintain an awareness of how you feel.
Remember that results accrue with regular practice, so make it a consistent ritual. Always prioritize gentle technique and proper prep/post-care, and you’ll maximize the positive effects of this traditional therapy in your modern routine.